
The answer? Do it yourself! I do, and you can too with a few tools and tips!
Easy steps for a natural nails manicure: (detailed below)
1. Remove old polish
2. File
3. Remove cuticle and moisturize
4. Polish!
5. Clean up is optional, but I do so I've included it here!
1. Remove old polish
Removal
I prefer pure acetone and cotton balls. It gets the job done swiftly and for me it works better than non-acetone removers and those diluted with glycerin, other additives or water. Pure acetone is actually less harsh of a chemical than non-acetone removers. You can always add a few drops of perfume oil or small amount of glycerin to your acetone if you prefer to keep it from turning some of the dead skin a white color. I do this with my clean up jar of acetone. I also use a plastic pump bottle designed for acetone, and it has saved me many a spill! (The pump pictured in the foil method article)
If you're wearing glitter don't fight it, the foil method is the best way to remove glitter without a fuss.
You might also check the entry from becacine about a Peel off base coat - I rarely use the foil method now that there's a great alternative.
2.File
A filing myth (debunked by Doug Schoon) is to saw across the free edge in one direction rather than back and forth. Doug Schoon says that's not necessary, the grit of the file is what matters most. From my own experience, I have found that sawing back and forth is ok as long as I use a finer grit file to finish afterward. I recently saw that Doug agrees. Below is the order in which I use each file and its type. It is imperative that your nails have not been soaked in anything wet before filing. They need to be completely dry/dehydrated before this step. If you've just showered, wait an hour before filing and don't wash your hands before starting the filing routine.
Files I use:
For natural nails, a fine to medium -grit cushion file is gentle yet effective. Basically, the higher the grit number, the smoother the file. I prefer files in the 240-600 grit range, which I feel are best for removing length and shaping the free edge of natural nails. Ultra fine files (600-2400 grit) are sometimes used for buffing and shining all types of nails but I do not recommend buffing the nail plate because it thins the nail. If you must buff, use the finest grit file you can find, be gentle, and do not do it frequently.
Files come in a variety of materials including padded cushion files, glass, mylar, ceramic, stone and metal. I avoid metal files as they are harsh and can tear or even split natural nails.
The file that I use most is a pink Soft Touch from Sally Beauty (as shown below) available for less than a dollar, with a club card. It's a cushiony disinfectable file with fine and extra fine sides. I find that it works perfectly to file down and shape my nails. These have since been discontinued but I found very similar files on Amazon in bulk.

To finish,I like to use a super fine foam block across the free edge just to smooth them out and prevent my nails from cutting me in my sleep. It's also great to remove the 'skirts' left over from filing. Again, Sally's carries them for less than a dollar!

Clippers / nails scissors:
I do use nail scissors and/or clippers on occasions when I need to get rid of a lot of length or to even up a break before filing. A lot of people in the nail community swear against clippers but if your nails are flexible and not dry and brittle then clippers will not make them crack and split. I like the big sized clippers for ease of use, any brand will do. Mine are generic and from a general retail store.
3.Remove the cuticle and moisturize
Cuticle Remover:
Please read the "What is Cuticle?" article before doing the next step, even if you feel you already know what the cuticle and proximal nail folds are. The information in the article may surprise you!
I have enjoyed using and can recommend both Blue Cross (from Sally Beauty) and Sally Hansen Cuticle removers. Both have an applicator tip which allows for placement of cuticle remover right where its needed. To start I place a drop on each cuticle/nail of one hand and then go back to the first nail and start removing the cuticle. I have also been using and loving the gel cuticle remover from KBShimmer. Afterward, I rinse and apply to the other hand in the same manner, working fairly quickly. I use a metal cuticle pusher for removal which is the best tool for removal, but requires care and some know-how as it can damage the nail plate if used incorrectly. The best implement to use when fairly new to this process is a birch stick or a plastic cuticle pusher. When you are comfortable with the pressure that's needed and know what results to look for, try out a metal pusher and see what you prefer.
I have written some very important information about the cuticle that should be read before doing this step. Please do read it, knowing what to remove and what not to remove can prevent a lot of pain and suffering. :)


Moisturizer:
I use a few different things, a lotion for frequent use on my hands throughout the day, especially after hand washing. I also use either a cuticle oil or a cuticle balm like Burt's Bees for the cuticle area after every hand washing (unless doing food prep).
For frequent use lotions, I use anything that smells and feels good - I especially look for those with known skin loving oils in them. One of my favorites is KBShimmer Shea body lotion, its creamy, full of skin loving ingredients, absorbs fairly quick, and feels great on my hands. It absorbs quickly and does not feel sticky or greasy.
For daily balms, I use either pure lanolin (Lansinoh), Burt's Bees cuticle balm, or an oil. All of these work well, and it's fun to alternate since they all contain different ingredients.
For an intense treatment, my favorite combo is a tiny amount, smaller than a pea, of Lanolin blended with Amlactin Ultra and then applied to cuticles and hands. It's an amazing combo to get supple looking cuticles and skin.
If you plan to polish after moisturizing, be sure to swipe the nail with acetone or alcohol first. This action will remove the excess oils which can cause polish to chip or peel. If your hands have been soaking in water, wait until the nails have dehydrated back to their normal shape before polishing.
4.Polish!
Base Coat/Top Coat:
The most important part of keeping your polish on for a long time and preventing chips is the base and top coat. When you find the perfect combination of these, nail polish brands won't matter to you any more. Even the .69 cent cheapie brands of polish will not chip as fast as they do without a good top and base.
I tried different combos to figure out what works best for me and what doesn't and finally found a few great combos:
Gelous for base coat and Seche Vite for top coat work magically together for me. I also use Gelous as a glitter tamer just before applying my top coat. Both are available at Sally Beauty Supply, and with a club card they have the best price in my area.
I made the switch from Seche Vite to indie brand KBShimmer's Clearly On Top topcoat and Fillin Groovy base coat. I find the topcoat to be glossier, just as fast to dry, not as stinky, less expensive and longer lasting in the bottle (SV gets goopy about 2/3 through. The base coat is a milky formula that blends nail ridges really well for a smoother polish application and finish. Plus they are both indie, so why not? Kbshimmer is available at Amazon and kbshimmer.com

(Disclosure: I wrote this article and made the switch when I was only a customer of hers and had no relationship with the brand. I began blogging for her some time in 2017 and receive these products for free or at a lower out of pocket cost to me. I still stand behind what I had said previously, and still use both of these products.)

Polishing Technique
After my base coat is mostly dry, ten minutes should do it, I start polishing on the color. To begin, I form a drop of polish on the bottom side of the brush. I do this by swiping one side of the brush against the bottle neck, and then swiping only the top half of the other side of the brush. This leaves a perfectly sized bead/droplet of polish on the brush. (photos of technique) I start in the middle of my nail near the proximal fold but not touching so that the drop doesn't flood the area. I gently push closer to the proximal fold but not quite touching and then pull the brush toward the free edge. I then do the same on either side of the center stroke. Reloading the brush with a drop of polish as needed. I usually do one hand and then start over on the same hand with the second coat.
Second coats can be tricky especially if the polish is a pastel or other streak prone color. The trick for those is to use a very light touch and as few brush strokes as possible. If its still a challenge, I will let the first coat dry really well or top with topcoat or matte coat and wait about five minutes before attempting the second coat of color. After the second coat top with topcoat, let dry about five minutes and polish the other hand.
5. Clean up
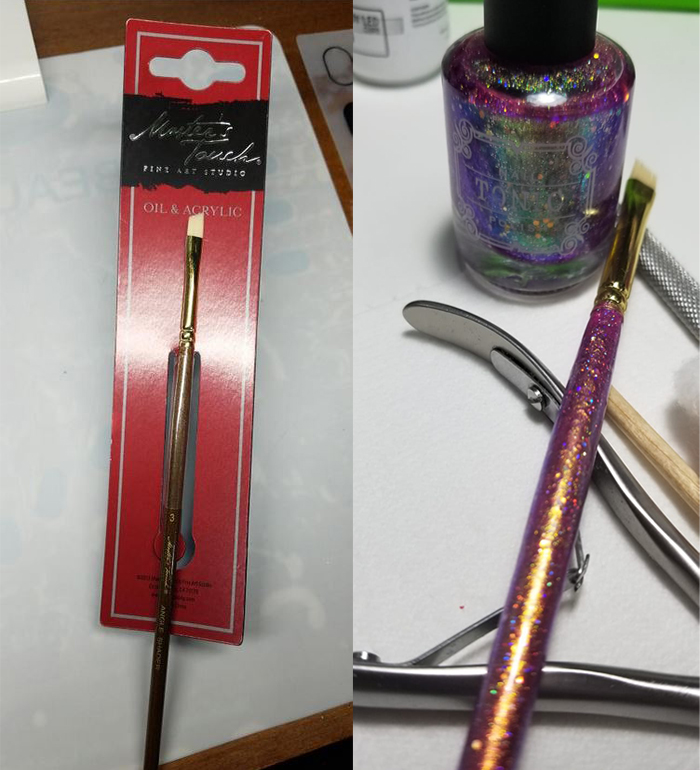
I use a bright desk lamp with a daylight bulb so that I can see really well when I paint and it helps to keep clean up at a minimum, however; it is usually a necessary evil. I like to use a short stiff brush dipped in a few milimeeter deep pure acetone stored in an old bath scrub jar that I cleaned out. The jar has a wide base to prevent tipping, and the lid keeps the acetone from evaporating. I add just enough acetone to the jar so that when the brush is dipped in, only the bristles get wet. I also add a drop of perfume oil or acetone additive to this so it smells good and prevents the white ashy look that acetone is known for.
My favorite clean up brush is a Masters Touch angled 3 (photos show before and after I decorated the handle). Other good ones I've enjoyed using are the Wet N Wild liner brush (on the right in the photo), and the Elf concealer brush. (shown in order in photos)


I think that pretty much wraps it up, please comment with questions and visit some of my other helpful articles linked in the sidebar. Thanks for reading!


